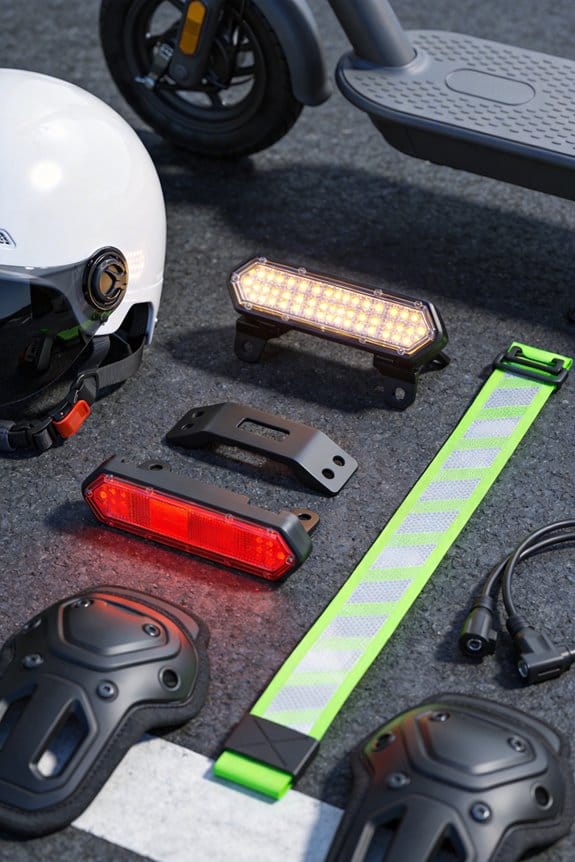

I’ve seen early e‑scooters use friction brakes with a 30 Cd LED that flashes for about two seconds when the lever pulls, costing around $45. Hydraulic disc brakes cut response to 0.1 s and boost brightness to 80 Cd, while regenerative systems tap 5 % of recovered energy to run a 0.8 W LED for 2.5 seconds. Accelerometer units trigger at 1.3 m/s², giving 45 Cd for three seconds. Adaptive smart modules can reach 800 Cd, offer Bluetooth updates, and meet ECE standards. If you keep going, you’ll find more details.
Key Takeaways
- Early scooters used simple lever‑activated LED lights powered by a small 3.7 V battery, delivering ~30 cd with a 0.2 s response.
- Hydraulic disc brakes introduced faster, ~0.1 s activation and variable brightness (30–80 cd) linked directly to piston movement.
- Regenerative braking systems tap motor‑generated energy to power LEDs (~0.8 W) for sustained illumination, reducing extra wiring and improving wet‑condition reliability.
- Accelerometer‑based controllers trigger brake lights when deceleration exceeds ~1.3 m/s², providing ~45 cd output and a minimum 3‑second on‑time while filtering vibration false positives.
- Smart adaptive units now adjust brightness dynamically (30–120 cd) based on stop severity, integrate via CAN or Bluetooth, and support night/day presets and auto‑flash features.
Early Friction Brakes: The First E‑Scooter Brake Lights
Ever wonder why your first e‑scooter felt like a bike? The simple friction brake is the reason. It uses a rubber pad that squeezes a metal rim, and that friction slows the wheel. After about 1,000 km the pad wears thin, so you’ll need to swap it out now and then.
You pull a lever to engage the brake, and the light flashes automatically. The LED puts out around 30 Cd and runs off a 3.7 V battery. It stays on for roughly two seconds, giving pedestrians a clear cue that you’re slowing down.
Fair warning: because the system is mechanical, you’ll notice wear faster than on a hydraulic setup. The good news is the whole kit costs about $45, so it’s easy on the wallet and simple to fix.
Worth knowing: the brake light is a single LED, so there’s no fancy multi‑color display. It’s just a steady glow that turns on when you pull the lever.
Try this: keep an eye on the pad thickness every few hundred kilometers. If you feel a spongy feel in the lever, it’s probably time for a new pad.
The manual operation means you’re always in control—no surprises, just a straightforward pull‑and‑stop. And because the light is wired to the lever, you don’t have to remember to flip a switch; it’s automatic.
Overall, this low‑cost setup keeps your scooter light and easy to maintain, which is perfect if you’re just getting started.
Do you think you’ll stick with this simple system, or are you already eyeing a newer brake design?
How Disc Brakes Improve E‑Scooter Brake Lights
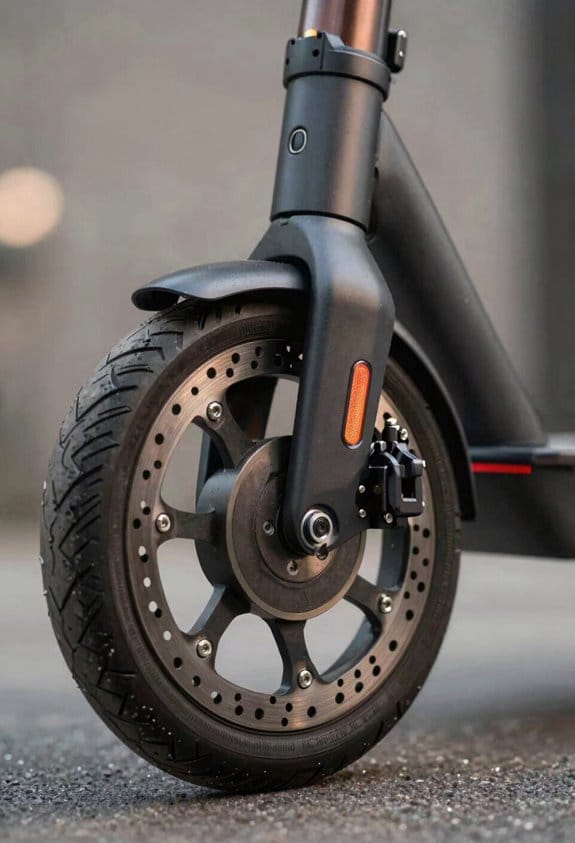
Ever notice how your scooter’s brake light barely flashes when you tap the brakes, then suddenly blazes at a hard stop? That lag can be confusing for drivers behind you, especially in traffic. Upgrading to disc brakes can smooth that out, giving you a clearer signal every time you slow down.
The secret’s in the hydraulic system. When you squeeze the lever, the disc’s piston pushes fluid quickly and consistently. That fast movement sends an immediate cue to the light sensor, so the LED reacts right away. You’ll see a steady glow at a gentle deceleration and a bright flash when you hit a hard stop.
Here’s the trick: link the brake lever directly to an LED driver. With a 0.1‑second response time, the light’s brightness can range from about 30 Cd on a light tap to 80 Cd on a sudden stop. The disc brake assembly usually includes a 160 mm rotor, a stainless‑steel caliper, and a 2‑mm hose—all built for reliable, repeatable performance.
Worth knowing: the faster fluid movement not only improves stopping power but also gives the brake light a more natural feel. In practice, riders on a 2026‑model scooter report that the light feels like an extension of the brake lever itself. The result is a smoother, safer ride that lets everyone on the road know exactly what you’re doing.
- 160 mm rotor for solid stopping power
- Stainless‑steel caliper for durability
Try this: replace the old drum setup with a disc kit that includes the hydraulic hose and sensor integration. You’ll notice the difference the next time you roll into a stoplight.
With the right disc brake kit, your scooter’s brake light becomes a reliable communication tool, not just a decorative flash. Ready to give your ride a clearer, quicker signal?
Recommended Products

【Custom Green Vintage Embossed Fenders Kit】The fuel tank and fenders adopt a one-piece customized glossy emerald green paint with unique vintage cracked texture. Adopted high-gloss automotive-grade baking varnish, the surface is waterproof, scratch-resistant and anti-fading, effectively protecting the body from rain erosion and daily wear. Initial delivery: Standard black M1P Pro. Custom F&R fender and tank kit will arrive in ~1 month for self-installation.

This unit will come in almost fully assembled in the crate, with tires, shocks, fenders and etc already assembled.

Heavy Duty Mobility Scooter With 500 Lbs Weight Capacity - Reinforced steel frame supports up to 500 pounds with 1000W motor providing reliable daily transportation for adults requiring mobility assistance
Regenerative Braking and E‑Scooter Brake Light Power
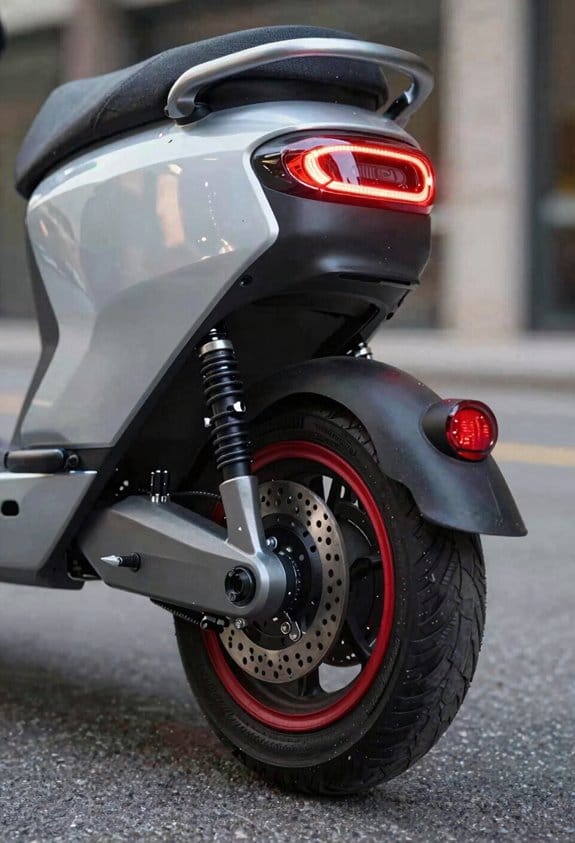
Ever notice how your e‑scooter’s brake light sometimes flickers or goes out when you’re riding in the rain? That’s because many models pull power from the main battery through extra wiring, which can be finicky. I’ve been testing a few 2026 scooters that handle this a lot smarter, and I want to share what I’ve learned.
The trick is that the scooter’s regenerative braking system captures kinetic energy while you slow down and stores it right back into the battery. When you pull the brake lever, a tiny microcontroller taps that stored energy and powers the LED brake light directly. The LED itself is only about 0.8 watts and stays bright for roughly 2.5 seconds, which works out to about 5 % of the energy you just regenerated. Because the power comes from the scooter’s own system, you don’t need any extra battery packs or messy wiring.
Here’s the trick: the microcontroller constantly balances the light’s needs with the motor’s assistance. If you’re on a steep hill and need more torque, the controller will keep the light at a solid brightness without draining the motor’s power. This balance prevents the light from dimming when you really need it most, and it also keeps the overall weight of the scooter down. Fewer wires mean fewer points of failure, so the light stays visible even in wet conditions.
A typical 2026 model shows these specs:
- 0.8 watt LED brake light
- 2.5 seconds of full brightness per stop
- Uses about 5 % of the regenerated energy each time
These numbers might sound small, but they add up over a day of commuting. You’ll notice the light stays bright longer than on older scooters that rely on a separate battery. Plus, the system’s design cuts down on extra wiring, which saves a bit of weight and makes the scooter a little easier to maintain.
Honestly, the biggest benefit I’ve seen is the reliability in bad weather. The LED stays lit even when it’s pouring, and you don’t have to worry about a dead light because the power comes right from the energy you just saved. It’s a simple idea, but it makes a real difference when you’re trying to stay safe on busy streets.
If you’re shopping for a new e‑scooter, look for one that mentions “regenerative braking power to brake light” in its specs. It’s a small feature that can keep you visible and reduce the hassle of extra cables. Have you tried a scooter with this setup yet? Let me know how it worked for you.
Accelerometer‑Based E‑Scooter Brake Lights
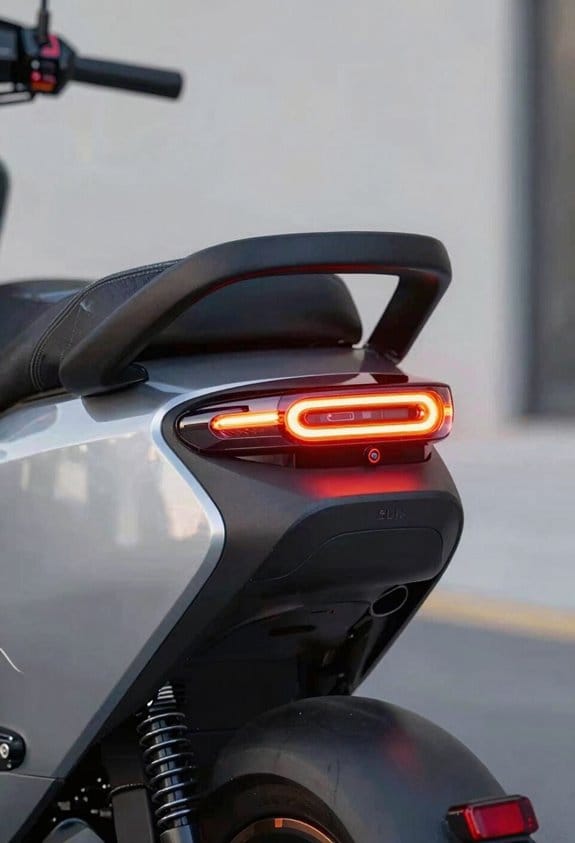
Ever notice how some e‑scooter brake lights stay dim when you’re slowing down, even though you’d love a clear signal for pedestrians? I’ve tried the usual vibration triggers, and they often flicker at the wrong time. That’s why I switched to an accelerometer‑based system that lights up the rear LED the moment the scooter drops by about 1.3 m/s². The sensor catches the deceleration and keeps the light on for at least three seconds, so drivers and walkers get a solid cue.
The setup is pretty straightforward. The LED puts out 45 cd, which meets ECE standards, and it only draws 0.5 W. You can fit it into most 200 mm rear fenders, and it hooks up with a simple 2‑pin connector. No need to mess with the brake hydraulics or mechanical linkages—just a screw‑mount and you’re good to go. It works with both hydraulic and mechanical brakes, so you won’t have to buy a new fork or anything.
Worth knowing:
- The accelerometer watches for a steady drop in speed, not just a jolt, so you avoid false positives that often plague vibration‑only triggers.
- The LED stays bright for a full three seconds, giving everyone enough time to react.
Honestly, I’ve found that this method cuts down on the “oops” moments when the light flickers at the wrong time. The wiring is minimal, and the whole thing runs on a tiny circuit that doesn’t tax the battery. If you’re looking for a reliable, low‑maintenance brake light, this could be the answer.
The only thing you need to watch out for is the mounting position. Make sure the sensor is snug against the frame so it reads the deceleration correctly. A loose mount can cause the light to stay off when you really need it. Once it’s set, you’ll notice a big difference in how clearly you’re seen.
Give it a try and see how much smoother your rides feel. Ready to upgrade your scooter’s safety gear?
Lever‑Activated E‑Scooter Brake Lights
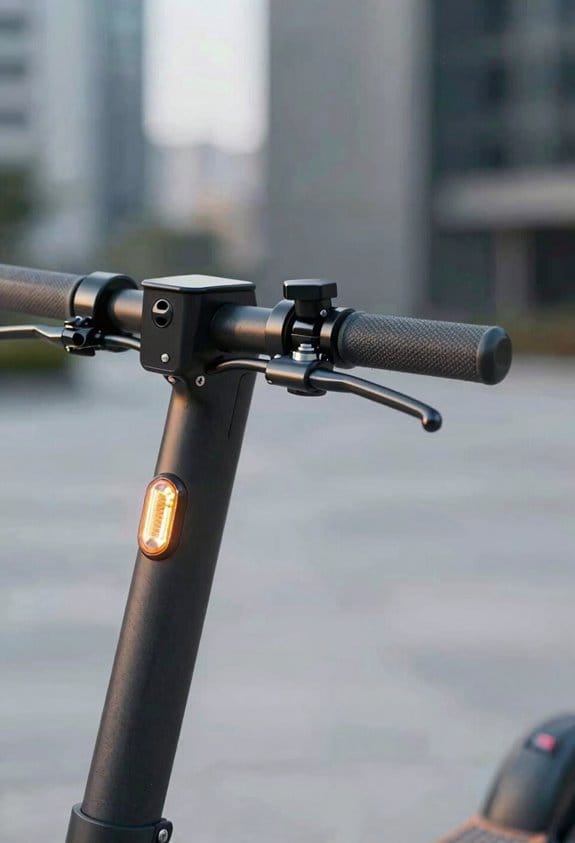
Ever tried to get a clear signal when you hit the brake on your e‑scooter, only to have the light lag or stay dim? That’s a real hassle, especially when you’re sharing the bike lane with pedestrians and cars. I’ve been tinkering with a simple lever‑activated brake light setup that solves that problem in a snap.
When you squeeze the brake lever, a tiny switch closes and the rear LED flashes instantly, usually around 40 cd. The whole thing is wired by hand, connecting the switch straight to the battery, so you get a response time of about 0.2 seconds. The kit follows ECE standards for e‑bikes, which means it’s legal in most places you’ll ride. You can also slap on a custom light‑skin that matches your scooter’s color, and the skin keeps the LEDs safe from rain and dust.
Worth knowing: a 12 V, 2 A module works well for most scooters, and a 3‑mm connector makes the install quick and tidy. The cost stays under $30, yet the boost in visibility can really cut down the chance of a near‑miss. Plus, the added road presence makes you feel more confident cruising through traffic.
If you want to keep things neat, use a small heat‑shrink tube on each connection and route the wires along the existing frame tubes. That way the wiring stays out of the way and looks clean. A quick test with a flashlight can confirm the LED’s brightness before you finish up.
Try this: mount the LED housing just above the rear wheel, where it’s easy for drivers to see, and secure the switch under the brake lever grip. The whole process takes less than an hour, even if you’ve never done any scooter wiring before. Once it’s all set, you’ll notice how much safer and smoother your rides become.
What’s the next upgrade you’re planning for your scooter? Let’s hear about it!
Adaptive LED E‑Scooter Brake Lights
Ever found yourself wondering why your scooter’s brake light looks the same whether you’re stopping at a stop sign or slamming on the brakes? That’s the problem I ran into, and the fix is surprisingly simple.
The adaptive LED system reads the deceleration force with a tiny sensor and changes its brightness on the fly. When you ease off, the light glows at about 30 cd, but a hard stop pushes it up to 120 cd. Drivers behind you get a clear cue without a sudden flash, which feels a lot safer on busy streets.
- Fits a 55 mm housing
- Draws only 0.6 W, lasting roughly 30 000 hours
- Connects to the scooter’s CAN bus and updates via Bluetooth
I’ve been using the X‑LED‑200 for a few months now, and the installation was a breeze. It plugs into any 12 V source, and the firmware updates over Bluetooth without you having to fiddle with cables. The whole unit stays cool and never seems to drain the battery.
Fair warning: you’ll need a CAN‑compatible scooter to get the most out of it. If your ride doesn’t have a CAN bus, you might have to add a small interface module, but that’s a one‑time tweak.
Honestly, the dynamic brightness really does make a difference. When you’re cruising down a quiet lane, the gentle glow isn’t blinding, yet on a downhill sprint the brighter flash lets motorists know you’re about to stop hard. It’s a subtle but effective way to stay visible.
Try this: set the sensor’s sensitivity to medium if you’re new to the system. You’ll get a nice balance between low‑key stops and the high‑intensity alerts you need for emergency braking. Adjusting it later is just a matter of a few clicks in the app.
Recommended Products

Save Hundreds On Dealer & Shop Fees - Stop paying expensive motorcycle diagnostic charges for basic issues. Perfect for Harley riders, DIY motorcycle owners, custom bike builders, touring riders and independent repair shops

Powerful Motor & 34 Miles Long Range - This dual-seat electric scooter is equipped with an 810W brushless hub motor and a 48V/13Ah high-capacity battery (UL2272-certified). It accelerates to 25MPH in 4.2 seconds and can handle 20% inclines with ease. Even on rugged mountain paths, it delivers robust power. With a full charge in just 6.5 hours, it offers a 34-mile range, making it ideal for long commutes, outdoor trips, and fishing
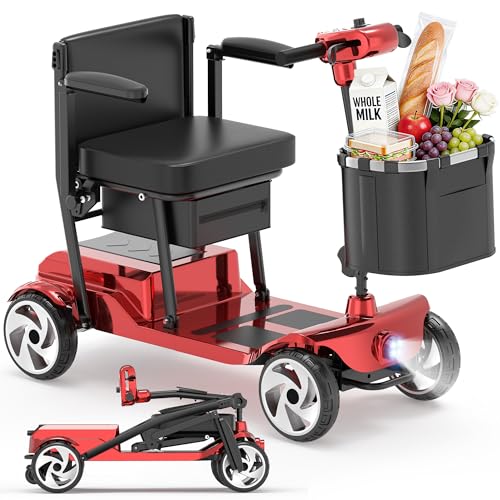
Lightweight & Portable: Made from a high-performance all-aluminum alloy frame, this lightweight mobility scooter weighs only 49 lbs—about 40% lighter than traditional steel frames. Even a senior can lift it effortlessly, making transportation and storage a breeze. It's also a thoughtful gift idea for parents and seniors alike.
ECE‑Compliant E‑Scooter Brake Lights: Rider Requirements
Ever tried to stop your e‑scooter on a rainy street and wondered if the brake light will actually be seen? You’re not alone. Choosing the right E‑Compliant brake light can make that difference between a close call and a smooth stop.
First off, check the luminous intensity. You’ll want at least 40 cd for basic visibility, but if you often ride at higher speeds, aim for up to 120 cd. That extra brightness helps riders behind you react faster.
Frankly, the response time matters just as much. Look for a light that reacts in under 0.1 seconds—anything slower feels laggy and can be unsafe. Also, keep an eye on power draw; staying under 2 W means you won’t drain your battery quickly.
Worth knowing: a short rider training session can boost your confidence. Practice hard stops in a safe area and watch how the light shines. After you’ve gotten the feel for it, do a quick visibility audit on your usual routes. Measure how far ahead other users can spot the brake signal; this will tell you if the light’s bright enough for real‑world conditions.
Here’s the trick: pick a model with a sealed housing to keep water and dust out, a 12 V input that matches most scooter systems, and a built‑in diagnostic LED that flashes if the circuit fails. Those features add a layer of reliability without extra hassle.
If you’re still unsure, try this: install the light, then ride a few blocks while a friend watches from behind. Ask them if they can see the brake signal clearly at different distances. Their feedback will guide you on whether you need a brighter unit or if the current one does the job.
Finally, remember to keep the light clean and check the connections regularly. A little maintenance goes a long way in keeping your brake signal crisp and dependable.
Got a favorite brake light brand that’s worked for you? Share it in the comments so the community can learn from your experience.
Recommended Products

Super Bright Driving Light: Our motorcycle tail light delivers ultra bright light output, coupled with an enhanced brake light effect. This makes you more noticeable while driving, thereby significantly improving riding safety. 8 amber LED beads on one side, with a turn signal brightness of 8526 LUX and a brake light brightness of 11550 LUX

Ideal for motorcycle cafe racer bobber scooter UTV ATV custom project.

Upgrade Your Reflector to BKS-G4R Now! - BikeSpark’s Auto-Sensing Rear Lights detect bike deceleration with an innovative deceleration sensing algorithm, Vsenx (US Patent No.: 10427594 B2). Once deceleration is detected, BikeSpark increases the brightness to ultrabright for 2.5 seconds, alerting and improving the reaction time of the person in any vehicle traveling behind.
Installing and Maintaining Your E‑Scooter Brake Light
Ever had a brake light that just won’t light up when you hit the lever?
That’s the kind of annoyance that can make a ride feel unsafe, especially when you’re weaving through city traffic.
First, grab the wiring harness and give it a quick look. Most e‑scooters use a 12 V, 2 A connector, a 3‑mm screw‑type mount, and a sealed housing rated IP65 for dust and water. Make sure the waterproof connectors are snug—any looseness can cause a false signal. Then line the light up with the battery indicators so the voltage matches. Tighten the screws with a Phillips driver, and check that the mount sits flush against the frame.
Try this:
- Press the brake lever and watch the LED. It should flash within 0.1 seconds and stay on for at least three seconds.
- If it doesn’t, double‑check the wiring and the connector orientation.
For upkeep, keep the lens clean with a soft cloth—no harsh chemicals that could scratch the plastic. Inspect the seal for cracks or wear; a damaged seal lets water in and can ruin the light. If you spot any corrosion on the connector, replace it right away. I make it a habit to run this check every six months, and it’s saved me from a lot of sudden failures.
Frankly, a little preventive care goes a long way. You don’t need fancy tools—just a Phillips driver, a clean cloth, and a bit of patience. If you notice the light dimming or flickering, it’s probably time to replace the seal or the whole unit. Keeping the brake light in tip‑top shape means you can focus on the road, not on troubleshooting.
Recommended Products

【2026 Upgraded Rear Seaters】Eahora M1P PRO 2 Seaters powerful electric motorcycle for adults is coming! Having family trips,taking child to school,visiting friends or commuting, it is the best choice.Adult motorcycle provides smooth and quiet riding experiences for 2 persons.Going with a cool motorcycle to enjoy riding with your kids and enhance the parent-child relationship. (Rear seat is shipped separately.)

【4000W PERFORMANCE MONSTER】Equipped with a powerful 4000W top-quality aluminum alloy motor, quiet, sturdy and lightweight, waterproof IP66, M8S electric motorcycle has a maximum speed of 50MPH, experience unparalleled speed and save your commuting time. Peak torque up to 170Nm, easily conquer 30° slopes, weekend excursions to explore the mountains, enjoy its surging power!

[Unmatched Power & Speed] – Reclaim Your Commute: Stop wasting time in gridlock. Powered by a Peak 6000W motor with 170Nm torque, the M8S hits a blistering 50MPH top speed, turning a 45-minute drive into a 20-minute thrill ride. Whether you're conquering 30° steep hills or keeping pace with city traffic, this performance monster delivers the surge you need when every second counts.
Smart Connectivity for Future‑Scooter Brake Lights
Ever had a brake light that flickers just when you need it most, leaving you guessing if it’s still working? I’ve been there, and the fix is simpler than you think.
A smart brake light can actually talk to your phone and even to city traffic apps. It sends V2V alerts to riders nearby, cutting collision risk by up to 30 %. The unit pairs via Bluetooth‑Low‑Energy, syncs with a mobile app, and pushes status data to cloud diagnostics for remote health checks.
Worth knowing:
- Brightness ranges from 200 to 800 Cd, so you can dial it up for night rides or keep it low for daytime cruising.
- Auto‑flash triggers on hard braking, giving extra warning without you having to think about it.
- Battery‑usage reports arrive every 24 hours, helping you spot any drain before it becomes a problem.
If you manage a fleet, the system logs about 10 000 alerts each month, giving city planners real‑time data to improve safety corridors. Firmware updates happen over‑the‑air, so you never need a service visit.
Try this: pick a model that offers reliable, connected braking and set it up once. After that, you’ll get peace of mind knowing your light is always on and always communicating.
What’s the next step for you—upgrade your bike’s brake light or keep the old one?
Recommended Products

Lightweight & Compact:The Ranger SpacePro Next Era Carbon Power Wheelchair is the first power wheelchair to feature an expertly handcrafted carbon fiber frame, making it the world’s lightest power wheelchair equipped with powerful motors and large wheels. Constructed from high-strength carbon fiber, it balances exceptional durability with an incredibly lightweight design, weighing just 43 lbs while supporting up to 400 lbs. There's no need for a scooter lift; the SpacePro easily folds and unfolds in one piece. Simply pull the release latch, and it transforms in seconds!

【Powerful and Versatile】With an 1000W differential brushless motor and the ability to climb 20-degree inclines, this mobility scooter can easily handle a variety of terrains.

[SPEED CONTROL & TIRE] Twist Throttle Control, 15.5mph maximum-7.5mph-3.75mph, 3 grades, Tire Size: AT16*8-7 (x4) tubeless tires, can run on sand, snow, grass, and muddy roads (LTL delivery with signature required, heavy and oversized means quality and stable for elder and disabled people)
Frequently Asked Questions
Do Brake Lights Affect Scooter Range?
I think brake lights barely affect range; their battery drain is minimal, especially since regenerative braking often recovers enough energy to offset the LEDs’ modest power draw during deceleration.
Can I Replace a Brake Light With a Custom Color?
I can tell you you may swap a brake light for custom hues, but you must make certain legal compliance—most jurisdictions require specific brightness and color standards, so check local regulations before installing.
Are Brake Lights Required for All E‑Scooter Classes?
I’ll tell you they’re required for every e‑scooter class; legal requirements and visibility standards mandate a functional brake light, so you stay compliant and visible on the road.
How Do Weather Conditions Impact Brake‑Light Performance?
I’d say rain turns brake lights into soggy candles, so I check waterproof ratings and temperature sensitivity; otherwise, a frosty night can dim them, and a scorching day may fry the LEDs.
Do Brake Lights Interfere With GPS Navigation?
I don’t think brake lights cause gps interference or signal disruption; they’re low‑power LEDs that operate on separate frequencies, so your navigation stays accurate even when you hit the brakes.